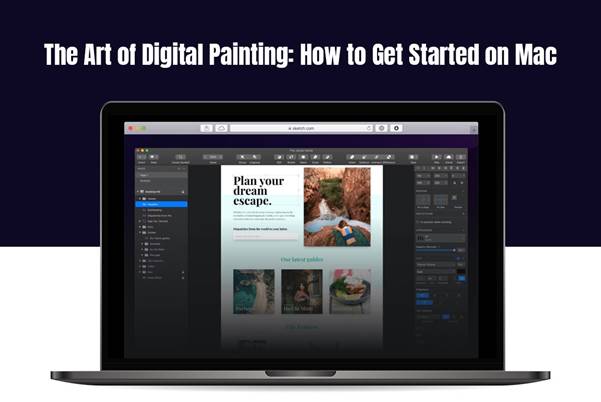
Digital painting is a versatile art form that allows artists to create stunning illustrations and concept art using painting and drawing tools on a computer. With the power of Mac computers and the array of digital art software available, it has never been easier to get into digital painting.
In this guide, we will explore the basics of digital painting on a Mac – the app you need, common painting tools for creating a digital masterpiece, and basic techniques to help you start creating your own digital masterpieces. Whether you’re an artist looking to expand your skills into the digital realm or a total beginner eager to start digital painting as a hobby, this article will give you a solid foundation.
With a passion for creating and a willingness to learn something new, the world of digital painting awaits – let’s get started!
Choosing Your Painting App
Before embarking on your digital painting journey on Mac, the first crucial step is selecting your preferred painting app. Unlike the straightforward Microsoft Paint app found on PC, there isn’t a direct counterpart called “macOS Paint” on Mac.
However, the Mac ecosystem generously offers a variety of alternatives, each bringing its unique set of features and functionalities to the artistic table. These include;
Preview
Preview is the simple paint app built into macOS that offers basic sketching and markup capabilities great for quick edits. It provides pen, highlighter, shape, and text tools users can leverage to draw, add comments, sign documents, obscure sensitive areas in screenshots, etc. However, Preview has limited advanced controls for brush customization and lacks robust artistic features.
Tayasui Sketches
Tayasui Sketches is a professional-grade sketching and painting program packed with ultra-realistic brushes, customizable layers, blending modes, ruler guides, and other robust features tailored for digital art creation. The advanced toolset allows for incredibly natural media simulation in a digital environment. Finished paintings can be exported in high resolutions, printed, or shared online. While the interface may seem intimidating for casual users, Tayasui Sketches provides incredible control and quality for serious Mac-based digital painters.
Procreate
A wildly popular digital illustration app across the Apple ecosystem, Procreate offers a similarly full-featured painting experience optimized for Mac. It provides photorealistic brushes, an advanced layers system, filters, adjustments, and perspective guides, and is more specifically tailored for illustrators and painters.
Getting to Know Your Tools
Here is a discussion of basic tools commonly found in digital painting apps:
Brushes and Brush Customization
Arguably the core tool is a range of brush types with extensive adjustments for size, opacity, flow, fall-off, texture, angle, pressure sensitivity, and more. Mimicking real-world paint brush allows blending, glazing, and sketching effects. Moreover, building brush presets speeds workflow.
Layers
Layers permit working on elements independently, non-destructively reshaping compositions. Options like opacity, blend modes, naming, folders, and locking refine layered workflow. This is essential for complex illustrations.
Color Palettes
Built-in color wheels, harmonies, and palettes allow systematic planning of attractive color schemes rather than random selection. Palettes can be saved for reuse and hue variation controls add nuance.
Transform Controls
Resizing, rotating, skewing, flipping, or distorting painted elements or entire compositions, which is useful for refinement. As a matter of fact, some apps allow nonlinear warping.
Selection Tools
Select specific portions of an illustration for localized adjustments by area, like brightness or saturation. Quickly modify specific regions without affecting the entire image.
History Navigation
Revert or restore to prior stages by accessing the chronological history of work. Enables progress comparison, backtracking, and protection from accidental mistakes.
Basic Digital Painting Techniques On Mac
Here are some basic digital painting techniques to utilize on Mac:
Use Layers – Create separate layers for different elements and stages of your painting to enable easy editing and experimentation. Adjust opacity, blend modes, and reorder layers as needed.
Customize Brushes – Tailor brushes to suit your style – adjust size, opacity, flow, pressure sensitivity, texture, and more. Create brush presets to mimic real brushes.
Use Color Wheels/Palettes – Select colors through digital color wheels and suggested color themes to craft appealing palettes and develop your pieces systematically.
Sketch Composition First – Block in basic shapes and structural lines to plan your painting composition before detailed rendering. Refine the sketch iteratively.
Limit Undos – Avoid over-relying on excessive updos during painting. Instead, commit to strokes to build texture and realism, and only undo sparingly.
Zoom for Details – Utilize the zoom feature to toggle between working big picture and refining small details. Paint general then precise.
Work from Dark to Light – Start with shadow tones as base layer, building up gradually to lights and accents. Mimics realistic depth and lighting.
Save Iterations – Save iterative versions as you work to allow backtracking and protect progress. Useful for experimentation.
Conclusion
And that’s a wrap on the fundamentals for embracing your inner artist through digital painting on Mac! By leveraging intuitive tools while unlocking advantages like non-destructive editing and streamlined workflows, beginners can delve into illustration expression. Don’t be intimidated by robust applications – core features like customizable brushes, layers, and color controls quickly build comfort through practice.


